
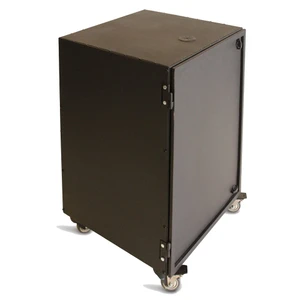

Kiosk Cart Printed Panel Set
Church On Wheels
$258.00
(No reviews yet)

Write a Review

Church On Wheels
Kiosk Cart Printed Panel Set
Shipping Dimensions:
Kiosk Cart Printed Panel Set
Give your Check-In Kiosk a professional, branded look with a custom printed panel set.
Designed specifically for the Church On Wheels Single Station Kiosk Cart, this printed panel set provides a finished, professional appearance while giving your church an opportunity to showcase its branding, colors, messaging, or ministry graphics.
The set includes custom printed graphics and backing material for the front and both sides of the kiosk cart, creating a cohesive visual presentation from every angle.
Whether you're matching your church's existing branding or creating graphics specifically for your check-in area, these panels make it easy to transform a standard kiosk into a polished extension of your ministry environment.
What's Included:
-
Custom printed panels for the front and two sides of the kiosk
-
Durable backing material
-
Custom artwork printing based on your approved design
-
Artwork template provided for easy design preparation - see below.
Important: This product includes the printed panels only. The kiosk cart is sold separately, and found here
Artwork Requirements: Customer-supplied artwork should be submitted using the provided template. Artwork must be prepared in CMYK with all text converted to outlines/shapes.
If purchased with a cart, our shop will install the panels before shipping. If this is purchased as an upgrade see below.
Please note that purchasing this printed panel as an upgrade will require custom installation. The panels do not come with pre-drilled holes, but self-tapping screws are included for attachment. When installing the new panel, ensure the self-tapping screws do not line up with the old or existing holes on the cart. You will need a drill with a Phillips head bit for this installation. Be sure to use a low torque setting on your drill to prevent the screws from going in too quickly and damaging the print. Once all panels are secure, 4 holes will need to be drilled for the door hinges. Use a 5/16 drill bit and drill from inside the frame to keep the bit lined up.
Installation Tips
- Preparation: Align the panel carefully before starting to ensure it is centered and straight.
- Drill Settings: Double-check your drill's torque setting before driving the first screw. A lower speed gives you better control.
- Hardware: Only use the provided self-tapping screws to avoid damaging the panel or the cabinet frame.
- Drill Holes for Hinge: Use a 5/16in Drill Bit to drill holes for the hinge bolts.
- Artwork Template:
- Blank Template for Kiosk Print


